

14 days free trial. $39/mo after trial. Cancel anytime. $40 ad coupon included


You've decided to try selling digital products online. Great choice. Now comes the part that overwhelms most beginners: actually launching the store.
The good news is that launching a digital products store in 2026 is dramatically simpler than it used to be. The bad news is that the available information online is so scattered, contradictory, and overwhelming that many people give up before they ever finish setting up.
This guide walks you through the entire process in a clear, sequential order. No fluff, no advanced strategies, no theoretical advice — just the practical steps to get from "I want to start" to "I have a working store ready to sell."
Plan for about 2 to 4 hours total if you're moving steadily, spread across one or two sessions. Let's begin.
Step 1: Decide what you'll sell
Before anything technical, you need a basic direction for what your store will offer. You don't need to overthink this. Most successful digital product sellers iterate on their product mix in the first few months.
For your first store, choose between two paths:
Path A — Create your own products. Best if you have a specific skill, hobby, or expertise. Templates, printables, guides, or design assets you create yourself.
Path B — Use a done-for-you catalog. Best if you don't have time or skills to create products from scratch. Several platforms (including Sellvia) provide a pre-built catalog of digital products you can sell immediately.
Most beginners start with Path B for the first store, then add their own products over time as they learn what their audience wants. There's no right answer — pick the path that fits your situation.
Step 2: Choose your platform
This is where most people get stuck. The advice online for which platform to use is contradictory and often financially motivated.
The honest framework: look for a platform that includes everything you need in a single subscription, with flat-rate pricing and no per-transaction fees. For digital products specifically, the essentials are a storefront, automated file delivery, payment processing, and customer access management.
If you choose Sellvia, all of this comes included in your 14-day free trial, so you can build your store and test selling without paying anything upfront. After the trial, the subscription is $39/month with no transaction fees.
If you choose another platform, run the math on transaction fees and required add-ons before committing. The cheapest sticker price is rarely the cheapest actual cost.
Step 3: Set up your store basics
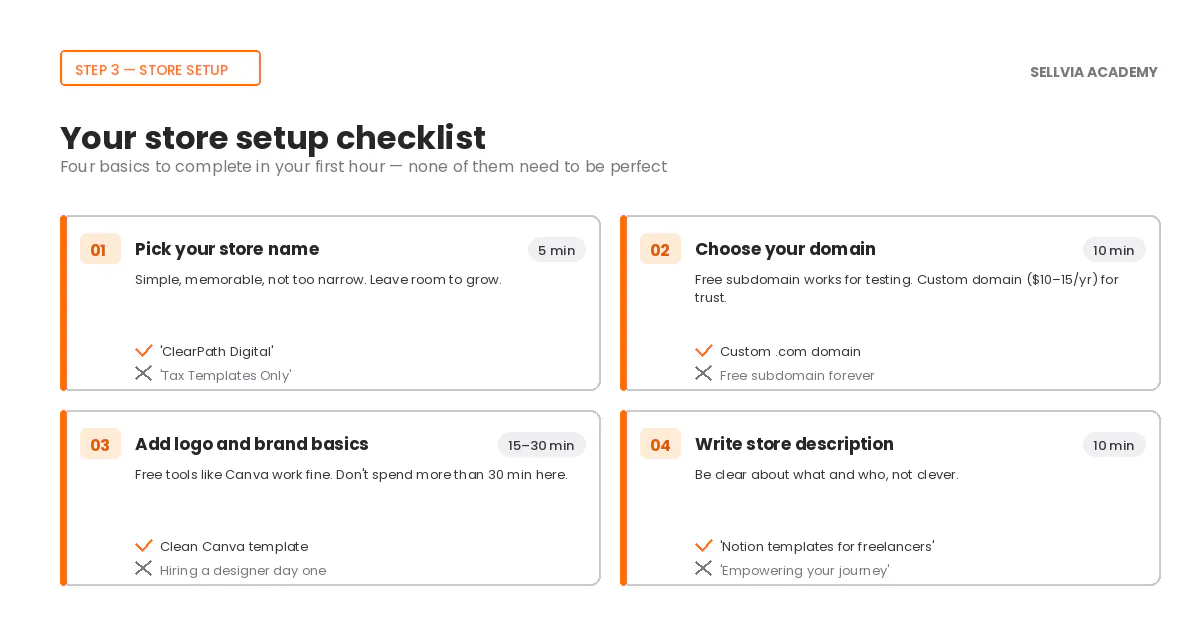
Once your platform is chosen, the initial setup typically takes 30 to 60 minutes. The core decisions to make:
Store name. Pick something simple, memorable, and not too narrow. You may pivot your product focus later, so a name like "ClearPath Digital" gives you room to grow. A name like "Tax Templates Only" limits your future options.
Domain. Either use the free subdomain your platform provides (good for testing) or buy a custom domain ($10–$15 per year, more professional). A custom domain helps with brand recognition and trust signals.
Logo and brand basics. You don't need a designer. Free tools like Canva have logo templates that work well for digital product stores. Spend 30 minutes maximum — you can improve this later.
Store description. A short paragraph explaining what you sell and who it's for. Don't try to be clever. Be clear: "Notion templates for freelancers and small business owners" beats "Empowering your entrepreneurial journey" every time.
Step 4: Add your first products
If you chose Path A (creating your own), aim for 5 to 10 starter products. More than that is unnecessary for launch. Less than that makes your store look too sparse.
If you chose Path B (done-for-you catalog), select 10 to 20 products from the catalog that match a coherent theme. Don't choose randomly across every category — your store should look intentional. If you're focused on home organization, all your starter products should relate to that theme.
For each product, write a clear title, a description of what's included, and what problem it solves. Three sentences is usually enough. Don't pad descriptions with marketing language — buyers want to know what they're getting, not why it's "revolutionary."
Step 5: Set your pricing
Pricing digital products is more art than science, but a few principles consistently work for beginners:
Templates and printables: $3 to $25 typically. Lower prices work better when starting because they reduce buyer hesitation.
Guides and ebooks: $15 to $47 typically. The lower end works for shorter guides; the higher end requires more substantial content.
Courses or workshops: $97 to $297 for new sellers. Pricing above this requires more established credibility.
Bundles: Group 3 to 5 related products and offer them at 20–30% off the individual sum. Bundles consistently outperform individual products in both conversion rate and average order value.
Start with prices on the lower end of these ranges. You can always raise prices once you have data on what's selling.
Step 6: Set up payment processing
Most platforms walk you through this with their own integration. The two payment methods you definitely want active are credit/debit cards and PayPal. Together, these cover the majority of online shoppers.
If you're in the US, Stripe and PayPal are the standard combination. If you're outside the US, your platform will guide you through the regional options available to you.
Make sure you complete the verification steps fully. Payment processors require basic identity verification before they release funds, and you don't want to discover this requirement after your first sale.
Step 7: Create the essential pages
Beyond your homepage and product pages, three essential pages should exist on every store before launch:
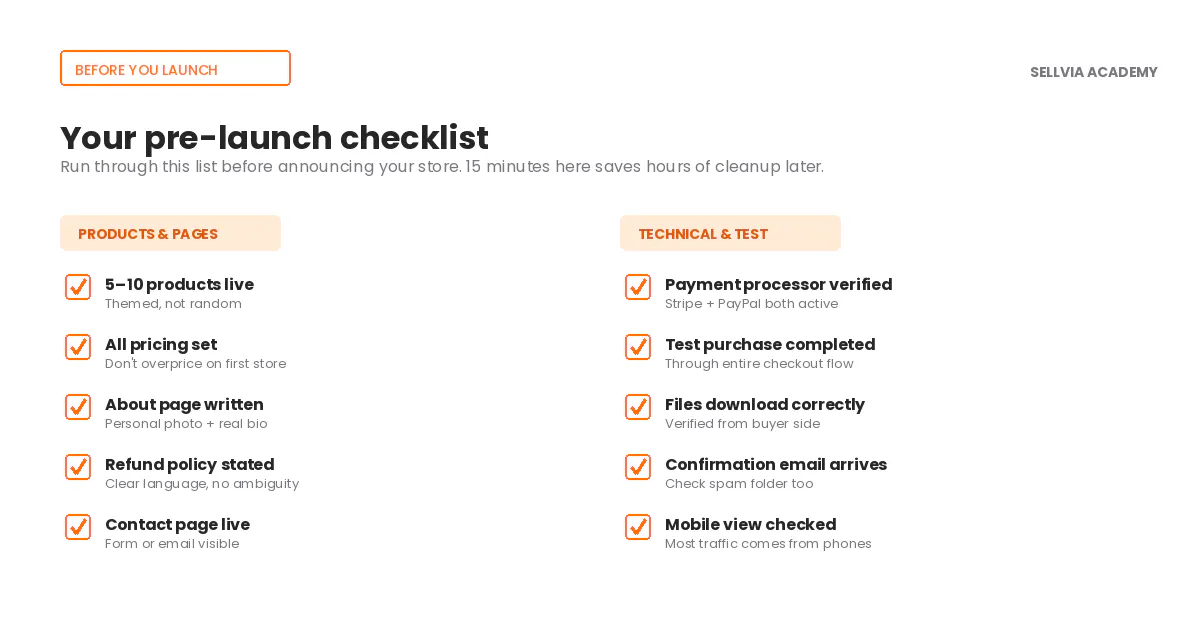
About page. Two to three paragraphs about who you are, what your store offers, and why someone should buy from you. Personal photos and a real bio significantly increase trust.
Refund and policy page. Clearly state your refund policy for digital products. Most digital product stores offer either no refunds (with clear pre-purchase descriptions) or a limited window for technical issues. State your policy clearly to avoid disputes later.
Contact page. A simple form or email address. Customer support questions are a normal part of running a store, and having a clear contact path reduces disputes and improves your reviews.
Step 8: Run a test purchase
Before announcing your store to anyone, complete a test purchase yourself. Go through the entire flow as if you were a customer: browse, add to cart, check out, complete payment, receive the file.
Note any friction points or confusing moments. Common issues to catch: file download links that don't work, confirmation emails that don't arrive, unclear post-purchase instructions, pricing that displays incorrectly.
This 15-minute test will catch issues that would otherwise frustrate your first real customers.
Step 9: Plan your first traffic source
A live store with no traffic doesn't generate sales. Before launching, decide where your first 100 visitors will come from. The realistic options for new sellers:
Personal network. Friends, family, social media followers you already have. This won't scale but is useful for testing the buyer experience and getting early reviews.
Pinterest. Free traffic source that works well for visual digital products (printables, art, templates). Takes 1–3 months to build momentum.
Instagram/TikTok. Active social presence in your niche. Time-intensive but builds an audience you own.
Paid ads (Meta, TikTok, Google). Faster but requires budget. Plan for $200–500 for initial testing.
You don't need to use all of these. Pick one to start with, learn how it works, then add others.
Step 10: Launch
The temptation is to keep tweaking the store before launching. Resist it.
Once steps 1–9 are complete, your store is ready enough to launch. The improvements you'd make in another week of tweaking are smaller than the improvements you'll make based on actual feedback from real visitors.
Set a specific launch date — within the next 3 days from completing setup. Tell at least 10 people in your network that your store is open. Run your first traffic activity (whether that's a Pinterest post, an Instagram story, or an ad campaign).
Your goal for the first 30 days is not high revenue. Your goal is to learn: what gets clicked, what gets purchased, what gets ignored. The data from your first 100 visitors will inform every decision you make for the next year.
What to expect after launch
The first 30 days of a new digital products store are typically slow. You'll have very few sales, you'll question whether anyone wants what you're selling, and you'll be tempted to redesign everything. This is normal and expected.
The sellers who reach consistent revenue typically follow a similar pattern: 30 days of slow learning, 60 days of optimization based on early signals, 90 days of building consistent traffic. Most of them describe a moment somewhere between months 3 and 5 when "things started to click."
You don't need to perfectly predict what will work. You need to ship a working store, learn from real data, and iterate. The platform handles the operational complexity so you can focus on the parts that actually grow income — testing products, refining marketing, and improving the customer experience over time.
You're now equipped to launch. The next step is to actually do it.

